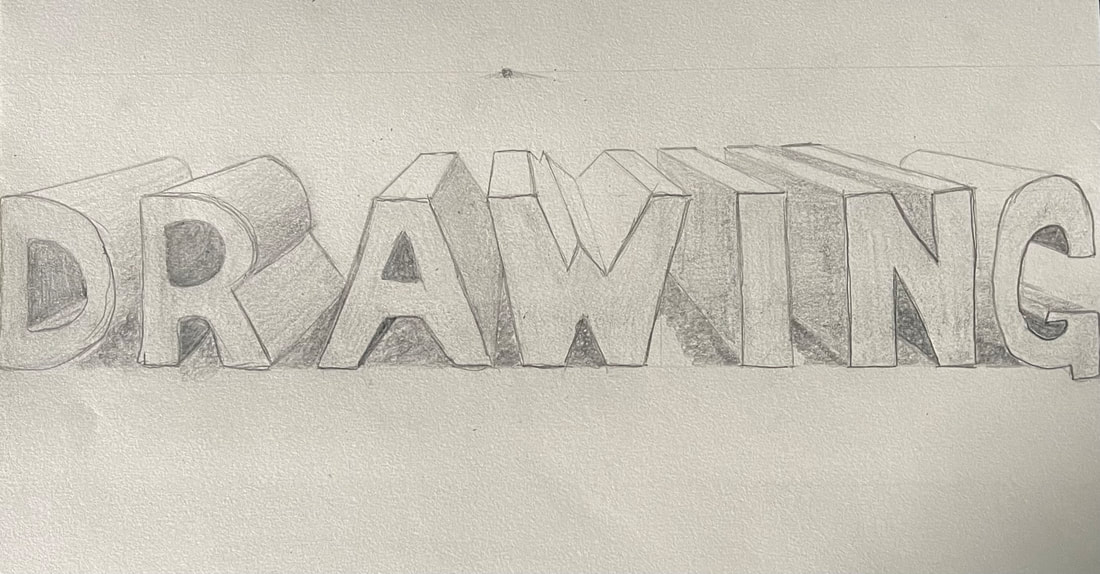
Four Drawing Assignment

The third assessment drawing was a foot. I chose to do a different position while doing the foot, instead of just flat. Reading AssignmentThe key to successful drawing is allowing yourself to make mistakes. When you draw what you see its called observational drawing. Artist who draw from their imagination usually have strong observational skills. Contour line drawing is another kind of line drawing. It is done slowly with smooth, even, continuous-looking lines. The three basic geometric shapes, circle, triangle, and rectangle, are the foundation of drawing. Casual perspective which refers to the ways we understand the relationships of things in space-allow us to explore issues in drawing objects that are in distance. A clip file is a collection of images that artists use a reference when they are unable to draw from observation, or as a means of stimulating creativity.
|
Perspective House
The was my fourth drawing which was a perspective house. I didn't add much detail to this house or the background. |


Blind Contour Drawings
These are my three blind hand contour drawings. I progressed a lot from the 1st to the 3rd. In the 1st one I was drawing in the same spot not moving the pen to get the shape and details. While doing the 2nd one I learned that I need to move, even though it feels like I'm drawing all over the paper I'm most likely not. Then on the 3rd drawing I was able to get more of the concept down, not quite there but more than before.

Blind Hand drawing #1
|

Blind Hand Drawing #2
|

Blind Hand Drawing #3
|
Modified Hand Contour
We were to draw three modified hand drawings, for the 1st one I wasn't able to use the time and finish the drawing. In my 2nd modified drawing I was able to finish more of the hand and bring it together with the details. The 3rd hand drawing is my least favorite the positioning was more challenging for me.

Modified #1
|

Modified #2
|

Modified #3
|
Contour Shoe Drawing
This is my Contour Show Drawing, I definitely don't think its my best. I wasn't able to capture all of the details that I wish I captured. I also need to work on my proportions I started off good then as I kept going I blew the proportions off.

Contour Bookbag
We were told to do a contour drawing of our bookbags. This came out better than I expected I do think more detail could have been added. I need to learn how to be able to capture the details I am seeing.

Classroom Contour Perspective

1. I tried to use one fluent line throughout this drawing, it was tough but you can see this is evident because every line is connected.
2. My knowledge was contributed to this, when doing other contour drawings knowing how and when to add the detail.
3. An outline drawing doesn't include the details that a contour drawing does.
4. The interpretation of the line shows the details and the contour that you were able to capture with one line.
5. If I was to recreate this drawing I would probably do a different perspective, being able to capture more details.
Paper Bag Drawing
For this paper bag drawing we were to scrunch up a paper bag and get all of the completions of the bag. I think I could have done better in shadowing and being able to capture all of the details.

Values Form Shading
For my values form shading I had two forms in front of me a cylinder, and rectangle. We were to show the shadows that we were seeing caused by the forms. And show how we have control over out pencil. Something I could have improved on was being more consistent with my shading.

Contour Plant
In this assignment we were to find a plant, inside or outside and do a contour drawing of the plant. I chose to draw a plant inside of my house, having to draw the wooden table I could have done better at adding the details. But being a contour drawing only being able to do one line making that hard.

At Home Still Life
We were to gather at least three items from our home and arrange them in a pleasing manner. I found three different sized plastic pumpkins. I was able to surprise myself with this assignment, I was able to capture the detail and shape of the pumpkins well.

Crushed Can
We were to chose a can, crush the can, and draw the can. Being able to add the details from the creases in the can that was created. I really like how mine came out, although I wasn't able to get much of the effect of the can being crushed it still came out good.

Still life
Reference Photos

|

|

|

|
Compositional Sketches

|

|


|

|
In Progress

|

|
Final Still Life Drawing

|
1. The craftsmanship of my drawing is clear, and is blended well throughout the drawing. With being able to capture the different values and shadows though out the picture onto the drawing.
2. I tried to make my values and shadows realistic, adding texture, shape and form. These values are important because they capture an understanding of the image you are trying to recreate. 3. There is a clear light source, coming from the top left. 4. The compositional sketches were important to get a feel for the space, and perception of the image's scale. By doing the compositional sketches you already have an idea planned out for your final. 5. I think my final drawing is successful because I was able to capture the different values and show how the light source is reflecting on the different objects being displayed. 6. Yes, the proportions and structure of the objects are correct. I was able to place the objects in the correct perspective and scale. 7. This drawing has a pleasing composition. The proportion and placement of the objects perceive a pleasing composition. 8. The center of interest is the statue, being the main interest, pulling in all the other objects. 9. When blending and shading all the objects it was hard to make some objects stand out more than others without making them too dark or light. 10. Shading and adding different values was a challenge for me, being able to capture the different values and them to the drawing was difficult. I was able to overcome this by shading little at a time. 11. During this project I have learned a better understanding of composition, placement, values and light source. |
Value Forms

Prisma Color

|

|

|
Prisma Color Veggie Drawing

1 Point Perspective
|

|
2 point Perspective

White Ribbon and Value Forms

|
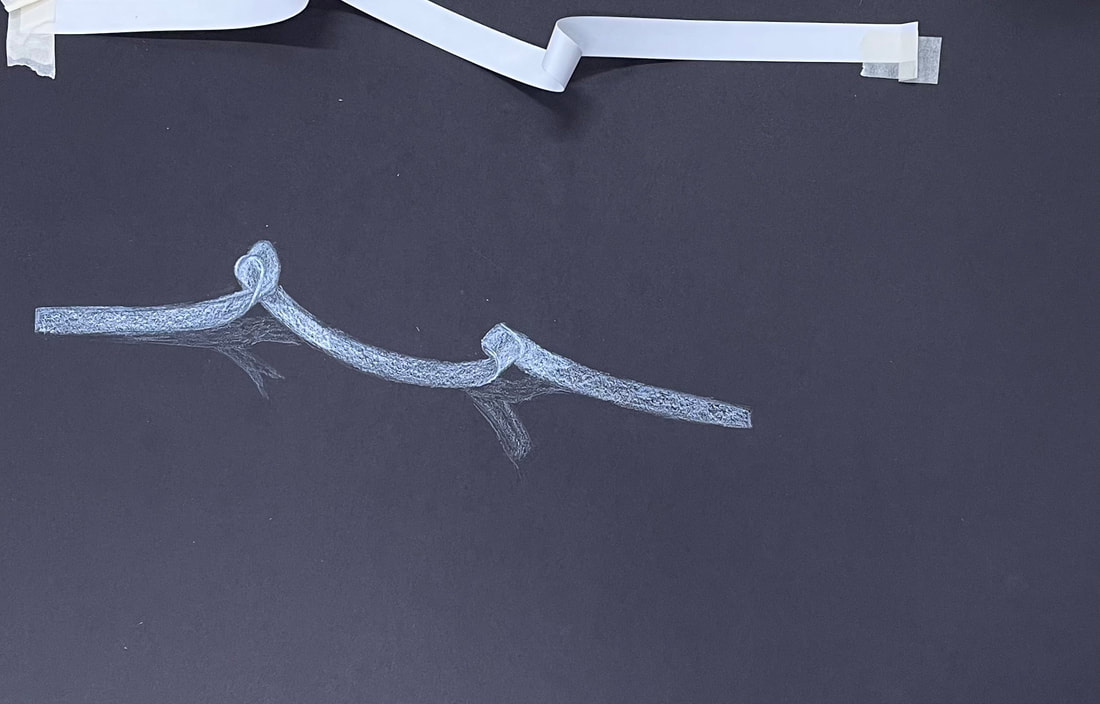
|
Look At That View
Brainstorming Ideas
- Sunflower in 3pt (looking up at the flower)
- Bottom of shoe (halfway up, mid-step)
- Pedestrian light in 3pt
- Big tree in 3pt
- 3pt of balloon flying away
- Dog chewing toy in 1pt
- Ants view of tennis balls on the ground
- Dog standing in grass in 3pt (dog smiling while looking straight down at camera)
- View from inside of guitar with strings in 3pt
- Looking down railroad tracks in 1pt (located in farmland)
- Cat laying down on cat tower 2pt
- View looking down from an attic
- Close up of rain running down window
- Worms eye view at the bottom of a pool
- Worms eye view in of faucet in sink
Reference Photos


|

|


|
Compositional Sketches

|

|
In Progress Photos

|

|

|
Final Drawing

|
Self Evaluation
|
Pastel Eggs

Wrapped Candy


|


|
Look What I Can See Through
Brainstorming Ideas
1. Spaghetti box with clear plastic and clear spaghetti sauce jar
2. Raw hamburger beef in package with hamburger buns and jar of pickles
3. Container of cherry tomatoes, mushrooms in clear packing, and bean sprouts
4. Box of sushi with chopsticks and clear soy sauce glass
5. Jalapenos in plastic bag
6. Bunch of cut fruit in ziplock bags with sandwich in ziplock on picnic setting
7. Pickled vegetables in mason jars
8. Clear wrapped candy
9. Tortillas in clear wrap with cherry tomatoes and lettuce in wrapping they come in
10. Wrapped lollipops
11. A couple glass milk cartons
12. Honey containers
13. Shampoo, conditioner and body wash
14. Bread Rolls in plastic bag
15. Clear box with jewelry inside
Compositional Sketches

|

|
Colored Sketch

In Progress

|

|

Final Drawing

Self Evaluation
1. My craftsmanship from this drawing is decently executed, I was a little rushed in completing this drawing. I feel that I could have executed a neater organized background in this piece.
2. In my drawing I created the look of transparency through the mason jars. Being able to see the picked green beans and asparagus through both of the jars.
3. Through my choice of colors I tried to display the colors I was picking up through my eyes from each vegetable. I was able to use various colors to perceive my drawing.
4. I was able to create contrast in my piece though the placement of two jars, and align them to give off good contrastment.
5. I used textures in the green beans and asparagus, when coloring them making sure to use the varies of textures in my piece. I tried to highlight the glare that was given on from the glass but wasn't very well portrayed. There wasn't really any shadow given off in my drawing.
6. It is important to understand pastels and prismas as a different media
you can use. Through this project you needed to be able to learn and understand the pastels and prisma's to be able to successfully distribute your skills on you pieces and can be used in the future on different pieces.
7. My biggest difficulty was capturing the different colors I was seeing from my reference photo and being able to display it through my drawing. Also being able to get the shape of every object in the jar and perceiving this piece for a transparency look.
Facial Features Drawings
Eyes
These are my two eye sketches where for the first one I was to follow along a video and sketch, then take a reference photo of my eye and sketch it.
These are my two eye sketches where for the first one I was to follow along a video and sketch, then take a reference photo of my eye and sketch it.

|

|

|
Nose
This is my nose portion where I was to follow along a video and sketch a nose, then to draw my own nose from a previous taken photo.
This is my nose portion where I was to follow along a video and sketch a nose, then to draw my own nose from a previous taken photo.

|

|

|
Mouth
For the mouth portion I was to follow along a video and draw a practice mouth. Then sketch my own mouth with a previous taken reference photo
For the mouth portion I was to follow along a video and draw a practice mouth. Then sketch my own mouth with a previous taken reference photo

|

|

|
Face
These two drawings are the practice and portrait sketches with my reference photo on the right. I was to follow along with a video for the first sketch then draw a portrait based off of a picture of you.
These two drawings are the practice and portrait sketches with my reference photo on the right. I was to follow along with a video for the first sketch then draw a portrait based off of a picture of you.

|

|

|
Self-Portrait
Brainstorming Ideas1. Half detailed face and other half abstract
2. My face swirled
3. Face in different cubes
4. Face turning into pixelated face
5. black and white, with map in the background
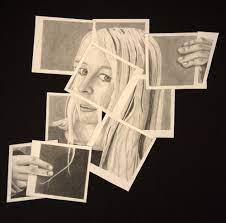
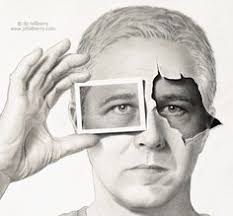
6. Different polaroid's with parts of my face
7. Abstract face shape with detailed features
8. Clown makeup
9. Close up expressive face
10. Shocked face with clown makeup
11. Looking through a fence
12. Broken mirror some pieces on my face smiling and some of them crying
13. Holding an ornament, reflection of me through the ornament
14. Me as zombie
15. Face with ants
2. My face swirled
3. Face in different cubes
4. Face turning into pixelated face
5. black and white, with map in the background
6. Different polaroid's with parts of my face
7. Abstract face shape with detailed features
8. Clown makeup
9. Close up expressive face
10. Shocked face with clown makeup
11. Looking through a fence
12. Broken mirror some pieces on my face smiling and some of them crying
13. Holding an ornament, reflection of me through the ornament
14. Me as zombie
15. Face with ants
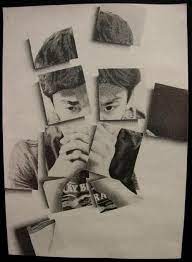
Reference Photo
|
|
|
Compositional Sketch's

|

|
Final Sketch

In-Progress Photos

|

|

|
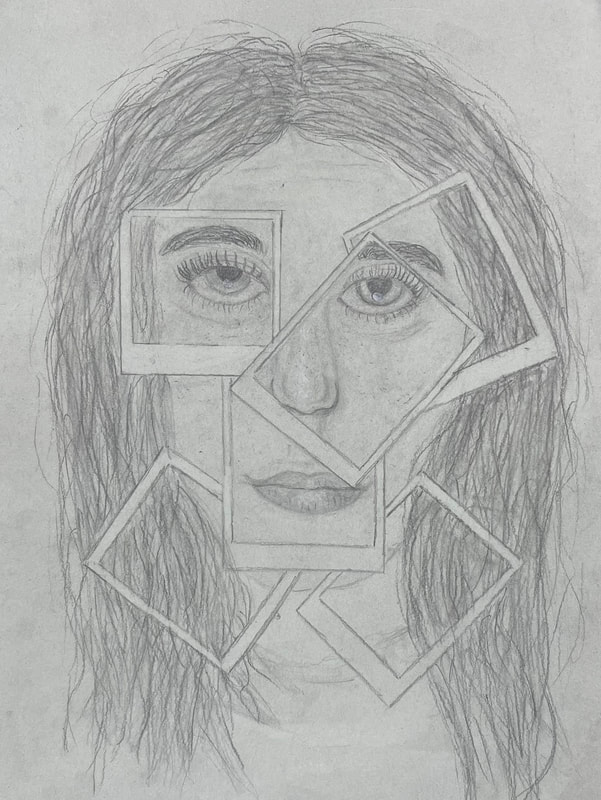
Final Protrait
|

|
1. The process I went though when developing my art is sketching out the polaroid's where I want them placed to line up with the facial features. Then sketching out the facial features in each polaroid. I did each feature one at a time and added detail along the way.
2. I chose to represent myself through multiple polaroid pictures being placed in different angles and overlapping each other. With a different facial feature in each polaroid.
3. I was able to achieve full range of value through highlighting and shadowing when needed to give off the right perspective through my drawing.
4. My art work is neatly distributed and there is a well understanding of what is being shown through my piece.
5. I was able to capture the look I wanted through my many reference photos. I found different photos of the same idea I wanted and got and idea off of my references to be able to produce what I wanted through my work. Then also having a reference photo of myself to achieve the look I was wanting.
6. I made sure I had the correct facial feature placement by using tracing paper and measuring with the eye scale to get correct placement.
7. It is important to be able to know how to draw all facial features so you can draw a portrait in the future and be able to sketch out what you are seeing.
8. The learning how to draw facial features I personally think was the most beneficial to me, watching the videos to get a better understanding on how to draw the features and use the different tools correctly.
9. One of my biggest obstacles in my portrait was the hair, I overcame this obstacle by watching a video to help me get an understanding and make the hair look how I wanted it too and realistic.
Reflection
Through taking this course I have learned quite a few things and improved from previous years, while this class was also challenging it pushed me. Previously I had taken art II online and was struggling and wasn't putting much effort into my work, this semester I was able to use my resources and tools to make my work completed and presented as best as I could. My favorite unit was the facial features unit with the self portrait. Learning how to properly draw the facial features really helped me throughout this unit.
